Classes in MS Teams (basic usage)
As part of Microsoft 365, offered by SU, the application MS Teams can be used for online courses. The application is compatible with OS Windows and macOS or can be run in web browsers MS Edge/Google Chrome. Other browsers are not fully compatible, as they don’t allow the use of audio/video courses.
As part of the license, every user of Microsoft 365 can create a team. The creator of the team is set automatically as an owner (teacher), which controls the setting and access of other users. He can give another user owner rights.
Basic recommendation for usage
For full functionality, as stated above, we recommend the installation of a local client. The installation file is available at this link
After installation of the application, log in with your username in the form of „your_CRO_username@ad.slu.cz“ (for example xyz9876@ad.slu.cz). Password is the same as in CRO (mail, ISSU).
It is also possible to use the mobile app Teams for Android and iOS.
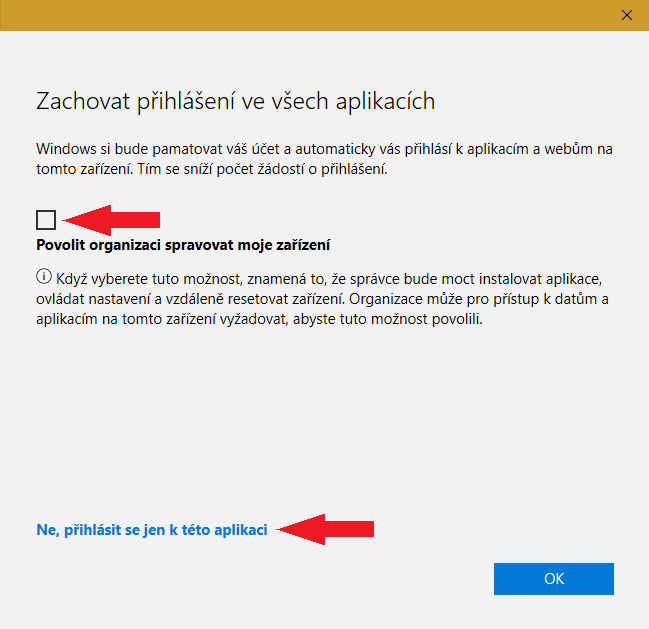
If asked, if you want to keep your login information in all applications, make sure to deselect the choice and click on No, only sign in to this application (the language of this window is automatically selected based on your OS). Pic.1
Webcam and mic
If you don’t use a notebook with an integrated cam and mic, you’ll need to connect an external set. Most webcams come with integrated mics.
Internet connection
A stable internet connection is required for use of video courses.
Adding team with a code
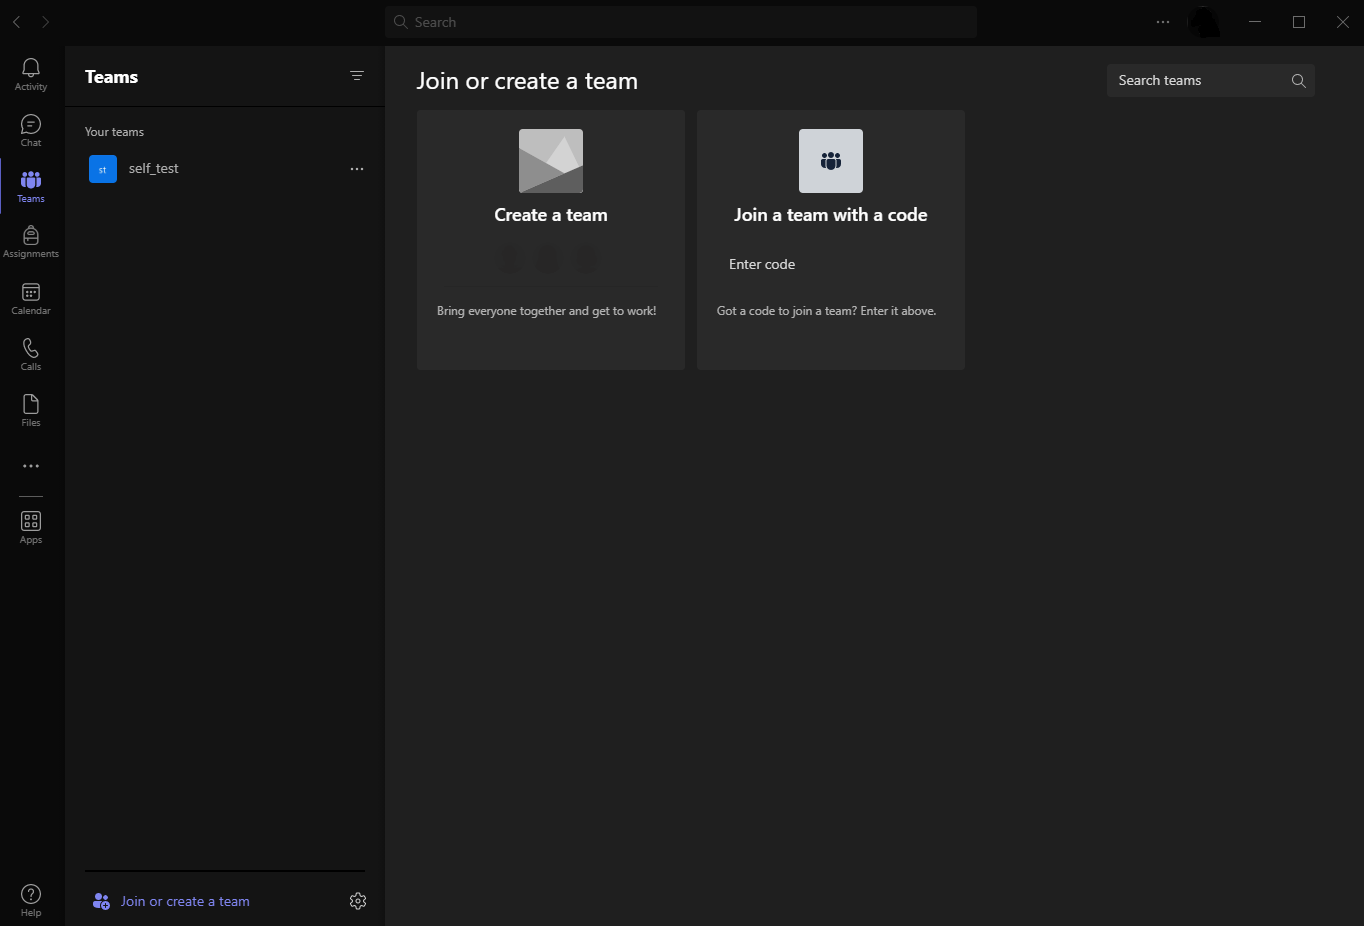
If your teacher sends you an access code for a team, insert it into the field Join a team with a code in the section Teams. Pic.2
After entering the code, the team will be added automatically to the list and you can immediately start working with it.
Adding a Team is a one-time operation. We advise you to add the Team as soon as you’ll receive an invitation from the teachers!
Signing into the meeting
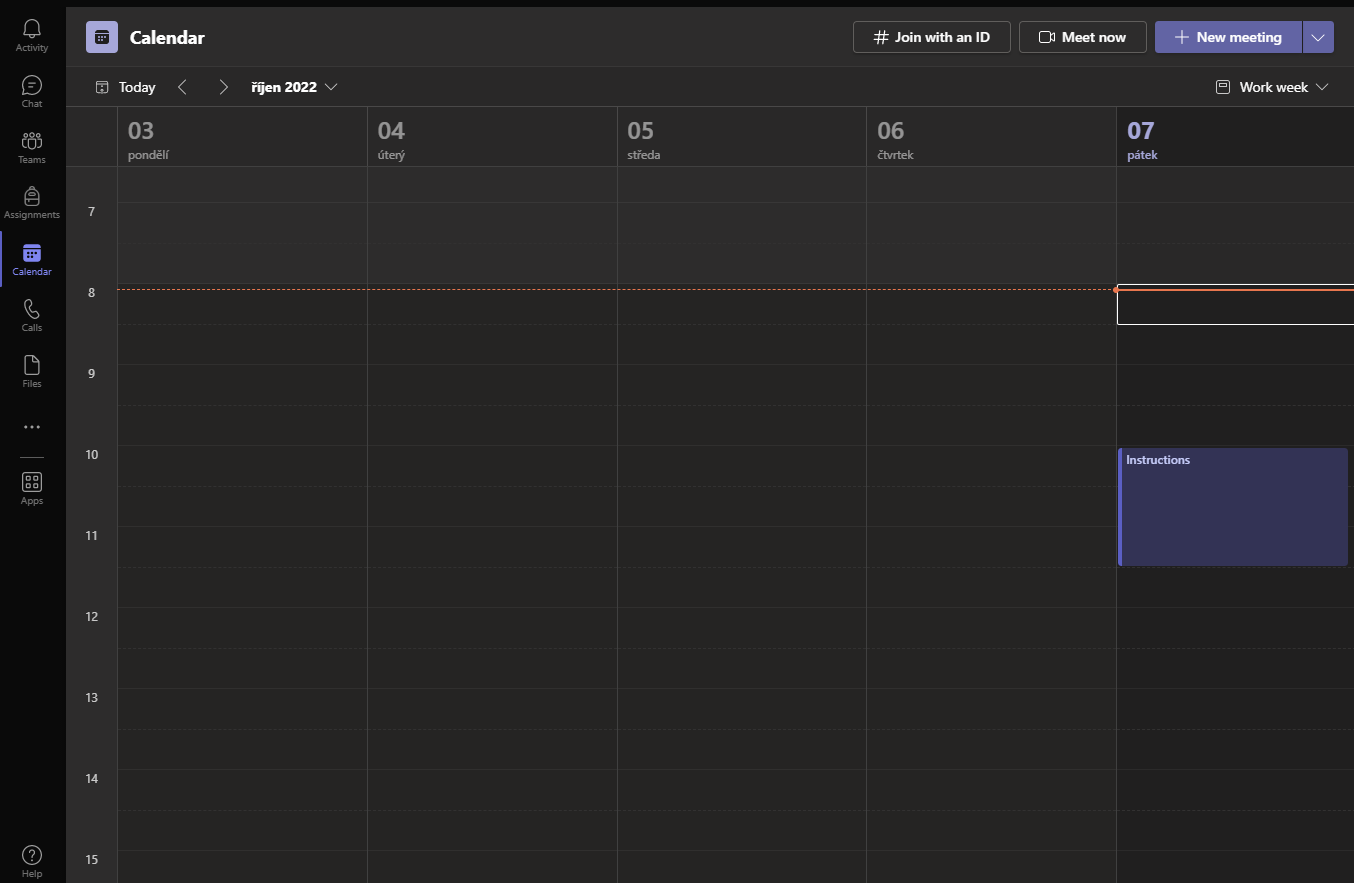
You can find the list of planned courses in the calendar on the main screen team. Displayed are all planned events of all teams you’re part of. Pic.3
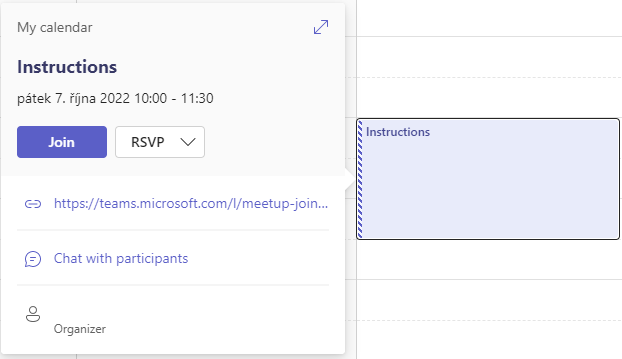
By clicking on the planned meeting, detailed information will be displayed. Clicking on „Join“, you'll connect to the selected meeting. Pic.4
Device control
We highly recommend turning off your mic during the lecture (the icon labeled „Mic“ on top of the screen) and only using it, if you are asked or asking a question. The same can be done with the camera. Pic.5
In case of a bad connection, it is best to disable both in and outgoing video. Pic.6
Icon labeled „Share“ is used to share content – desktop, app window, presentation saved on OneDrive, whiteboard.
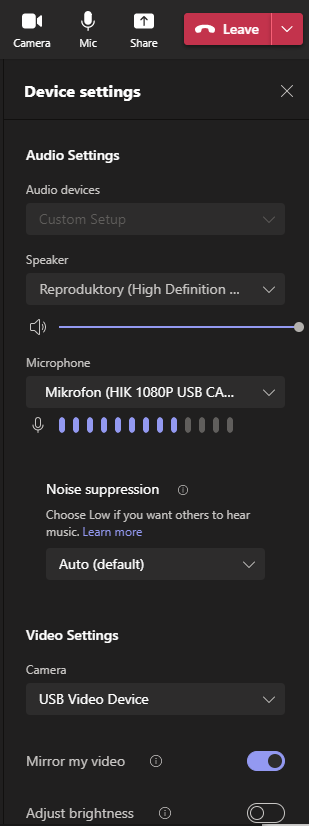
If needed, you can access the device setting under the three-dot icon labeled “More”. Here you can select which device is used or even mute it. Pic.7
